Can’t add MP4 videos to iTunes any more
Question: I have been adding my mp4 videos to iTunes fine all day by dragging and dropping them to iTunes. They were then going to home videos so I moved them to movies. Now when I try and add more video files they aren’t appearing anywhere in the library not in movies or home videos. I have not changed any settings on the laptop or iTunes and am using up to date versions of both. I don’t know why it was working one minute and now it’s stopped all of a sudden. Any help would be greatly appreciated.Thank.
Toshiba laptop, Windows 10, Windows 10 and latest iTunes being
iTunes Automatically Add to iTunes feature
When you install iTunes 9 or later versions, it automatically creates an Automatically Add to iTunes folder in your ~/Music/iTunes/iTunes Music folder (or under ~/Music/iTunes/iTunes Media if you created a new library). When you put an iTunes-compatible media file in this folder, it will, as the name suggests, be added to iTunes automatically. However, if the video formats are not supported by iTunes, iTunes will rejects the file and move it to a Not Added subfolder within the Automatically Add to iTunes folder.
How to Add MP4 to iTunes?
It is well know that MP4 is a container file format, it can be encoded with many different video and audio codecs. If your MP4 files are moved to Not Added subfolder by iTunes, it’s most likely that the MP4 files are encoded with the codec that are unaccepted by iTunes. To add MP4 to iTunes, you will need to convert MP4 to iTunes best supported MPEG-4 or H.264 codec.

Here, a professional MP4 to iTunes converter – Pavtube Video Converter is recommended to you, you can easily convert MP4 but also other incompatible file formats such as AVI, WMV, MKV, FLV, VOB, Tivo, MXF, AVCHD, H.265, etc to iTunes playable MPEG-4 or H.264 codec. If you wish to sync MP4 video from iTunes to iOS devices such as iPhone, iPad or iPad, you can also choose to directly output MP4 video to device preset profile formats according to your device specific models.
Trim/Merge/Split/Effect MP4 video
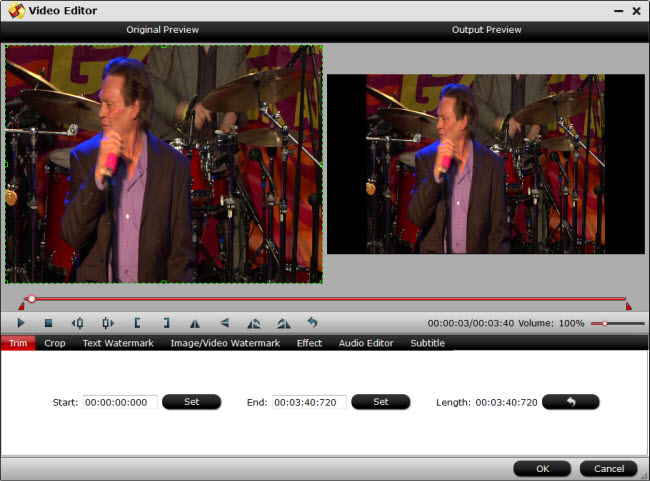
Before moving video to iTunes, you can do some simple video editing work with the MP4 video, you can trim the video to remove unwanted portion, merge separate video clips into single one, split large files into small pieces by file size, count, number, add special rendering effect, insert external subtitles, etc.
For Mac users, you can turn to download Pavtube Video Converter for Mac to convert MP4 to iTunes playable codec on Mac OS X El Capitan.
Free trial for Windows version
Free trial for Mac version
How to Convert and Move MP4 Video to iTunes Library?
Step 1: Add MP4 videos.
Run the MP4 to iTunes converter program on your computer, click “File” > “Load Video/Audio” or “Load from Folder” to import MP4 video files into the program.

Step 2: Choose output file format.
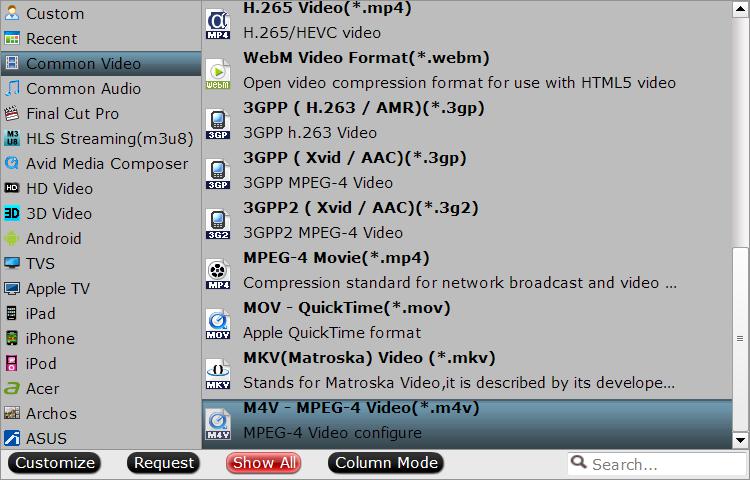
Click “Format” bar, from its drop-down option, select to output iTunes best compatible MPEG-4 codec with M4V file extension by following “Common Video” > “M4V – MPEG-4 Video (*.m4v)”.

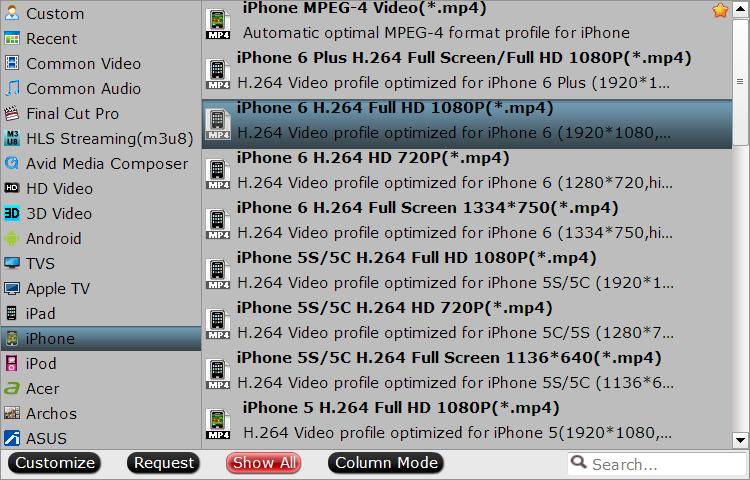
Tips: If you wish to sync video from iTunes to iPhone or iPad, you can directly choose to output iPhone or iPad preset profile formats with all the suitable parameter settings.

Step 3: Edit MP4 videos.
On the “Video Editor” Window, you can play and preview the original video and output effects. Also you can flip video, trim, add special effect, reset, and adjust volume.

Step 4: Start MP4 file to iTunes conversion process.
Go back to the main interface, hit right-bottom “Convert” button to start the final conversion process.
When the conversion is done, click “Open Output Folder” icon on the main interface to pop out the folder with converted files, then you will have no problem to import MP4 video to iTunes for direct playback.


