It’s likely that you have recorded a M2T file with your JVC GY-HD100 720p Camera and DR100 Digital Recorder and you may wish to convert the M2T into MOV format for importing to iMovie for editing but have no ideal how that can be achievable in a simple yet effective way. The following article will show you a simple workaround to get the job easily completed.
Why need to convert M2T to MOV?
M2T is the High-definition video recording format used by many HD camcorders; commonly referred to as “HDV;” uses MPEG-2 compression to store HD video data on DV or MiniDV tapes; supports resolutions of 720p and 1080i. From iMovie supported file formats, we can see that iMovie has included native importing support for MPEG-2 format, however, as the HDV M2T uses a long GOP MPEG-2 compression codec, the native playback of this codec is very processor-intensive because displaying a single frame can require decoding of several frames earlier or later in the video stream. As a result, you may be able to play back fewer real-time effects when editing in this format.
Therefore, if you wish to get better playback performance when editing HDV M2T video on iMovie, it would be much ideal for you to transcode the HDV M2TS to Apple Intermediate Codec, a high performance and quality video codec designed by Apple mainly used as a less process-intensive way in working with long-GOP MPEG-2 footage such as HDV. Unlike MPEG-2 based HDV, the Apple Intermediate Codec doesn’t use temporal compression, enabling every frame to be decoded immediately without decoding other frames.
Best tool to encode M2T to iMovie AIC MOV
To produce iMovie most favorable AI MOV format, you will need a specific application. Here, a powerful yet simple to use application called Pavtube Video Converter for Mac (review), the program has perfect importing support for both 720p or 1080p M2TS HDV files, you can directly use the program to generate iMovie high quality, high performance and less process-intensive Apple Intermediate Codec codec with MOV file extension with perfect quality. To get better output video and audio quality, you can flexibly adjust output profile parameters such as video codec, resolution, bit rate, frame rate, audio codec, bit rate, sample rate and channels, etc.
Edit M2T with built-in editing function
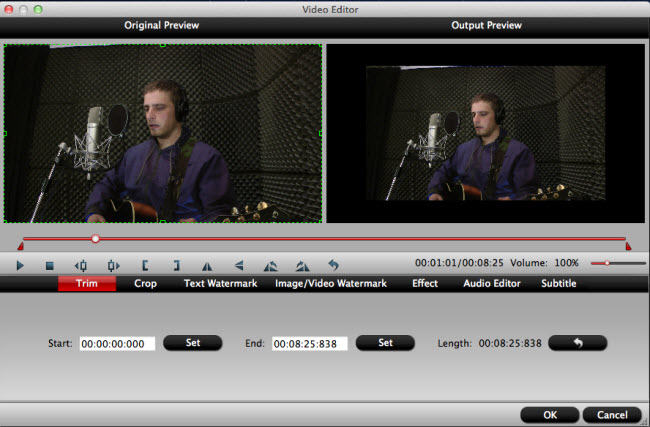
Before loading the M2T into iMovie for post editing workflow, you can complete some simple editing work with the program’s built-in editing tools. You can flip or rotate the footage if is recorded in wrong orientation, trim or cut off video to remove unwanted parts or segments, crop video to remove the black bars around the video frame, deinterlace interlace 1080i video into progressive form, add external SRT/ASS/SSA subtitle to video, etc.
Pavtube Video Converter for Mac is available on macOS Sierra 10.12, Mac OS X El Capitan 10.11, Mac OS X Yosemite 10.10, Mac OS X Mavericks 10.9, etc. The program is pretty simple to use, no matter experienced user or fresh could handle it very well. In addition, it produces high quality results, the quality of the converted video is most identical to the original video.
How to Convert M2T to iMovie AIC MOV for High Performance and Quality Editing Workflow?
Step 1: Transfer HDV M2T footage to local Mac computer.
Connect your HDV camcorder or DV device to your computer via FireWire, then transfer your HDV M2T footage from the camcorder to your local Mac computer.
Step 2:Load HDV M2T file format into the program.
Download the free trial version of the program. Launch it on your computer. Click “File” menu and select “Add Video/Audio” or click the “Add Video” button on the top tool bar to import source HDV M2T video files into the program.

Step 3: Define the output file format.
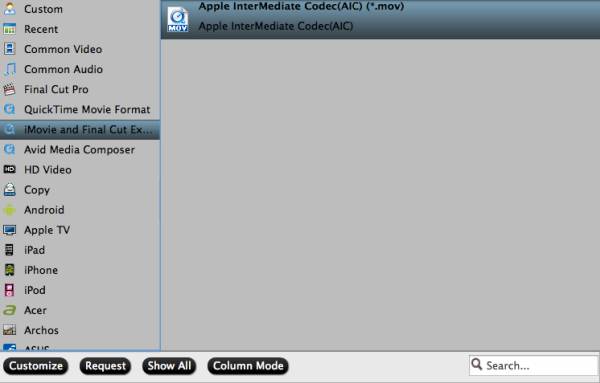
Clicking the Format bar, from its drop-down list, select iMovie best favorable “Apple Intermediate Codec (AIC)(*.mov)” format under “iMovie and Final Cut Ex…” main category as the final editing format.

Tips: Click “Settings” on the main interface to open “Profile Settings” window, here, you can flexibly choose or specify exactly the parameters including video codec, resolution, bit rate, frame rate, audio codec, bit rate, sample rate, channels, etc as you like to get better output video and audio quality.
Step 4: Edit HDV M2TS format.
By default the Edit icon is grayed out. To activate the Edit menu, you have to select an item first. When a video or movie is selected, click the pencil like Edit icon on the left top tool bar to open the video editor window, here, you can play and preview the original video and output effects. Also you can flip or rotate video, trim, crop, add watermark, apply special effect, edit audio or insert external.

Step 5: Begin the conversion process.
After all setting is completed, hit the “Convert” button at the right bottom of the main interface to begin the conversion process from M2TS to iMovie AIC MOV.
When the conversion is finished, click “Open Output Folder” icon on the main interface to open the folder with generated files. Then feel free to import the video into iMovie for high quality, high quality and less process-intensive editing workflow.


