As an easy screen recording and video editing software, you don’t have to be expert to make amazing videos with Camtasia by splitting clips, trimming, speeding up or slowing down footage. In addition, you can also add special effects such as highlights, animation, titles, transitions and more, etc. Have some movies or TV shows downloaded from online sites with MKV format and wish to load them into Camtasia Studio for creating amzing videos. However, you may fail to do that due to the format incompatible issue, the following article will show you what are supported importing video formats by Camtasia Studio and how to successfully load MKV to Camtasia Studio for editing.
Camtasia studio supported file formats
You can import the following video and audio formats into Camtasia Studio (Windows and Mac) for editing:
|
Platform |
Video Formats |
Audio Formats |
|
Camtasia Editor for Windows |
.AVI |
.MP3 |
|
Camtasia Editor for Mac |
.MOV (QuickTime movie) |
.AIFF |
From above table lists, we can see that both Camtasia Studio for Windows and Mac has excluded native importing support for MKV files.
Solutions to fix Camtasia Studio not import MKV files
For Windows users, you can open the MKV file in a desktop media player or web browser with Camtasia Recorder for Windows to create a .TREC file and import that into your project. You can also convert the video formats with the free and open-source video transcoder – Handbrake. For Mac users, you can choose to record the playback in a desktop player or web browser window with Camtasia Recorder for Mac to create a .CMREC file for importing that into Camtasia Editor for Mac. As for conversion files, you can do the conversion with MPEGStreamclip, VLC, Handbrake or QuickTime Pro to a format that Camtasia for Mac that will read.
Professional tool to transcode MKV for Camtasia Studio editing
Sometimes, you may find above listed free conversion tool is too complicated to operate, not ensure you to produce a good quality video result, fail to handle certain MKV files due to the codec and resolution issue and the conversion speed is too slow. The good news is that here comes the powerful Camtasia Video Converter – Pavtube Video Converter, which can be downloaded and installed on both Windows and Mac platform (get Mac version).
The program has perfect importing support for all 4K/2K/HD/SD MKV files encoded with various different video and audio compression codec listed below:
Video codec: MPEG-1, MPEG-2, H.264/MPEG-4 AVC, H.265/HEVC, VC-1/WMV, MVC
Audio codec: MP3, WMA, AAC, AC3, DTS, FLAC, ALAC, DTS-HD
Related articles: Convert Camtasia Recordings to Any Formats | Convert Camtasia Recordings to MP4 | Edit AVI with Camtasia Studio Mac
Thanks to its batch conversion mode, you can load multiple MKV files into the application for conversion at one time to save your precious time. With this powerful yet simple to use application, you can easily produce Camtasia Studio for Windows and Mac supported video and audio file formats listed above.
Since Camtasia Studio has specific requirements on the frame rate for the video loading into it, you can easily achieve that by flexibly adjusting the output video frame rate to the compatible value in the program’s “Profile Settings” window, you can also change other settings such as video codec, bit rate, resolution, audio codec, bit rate, sample rate, channels, etc according to your own needs.
Step by Step to Convert MKV for Camtasia Studio Importing and Editing
Step 1: Load MKV files into the program.
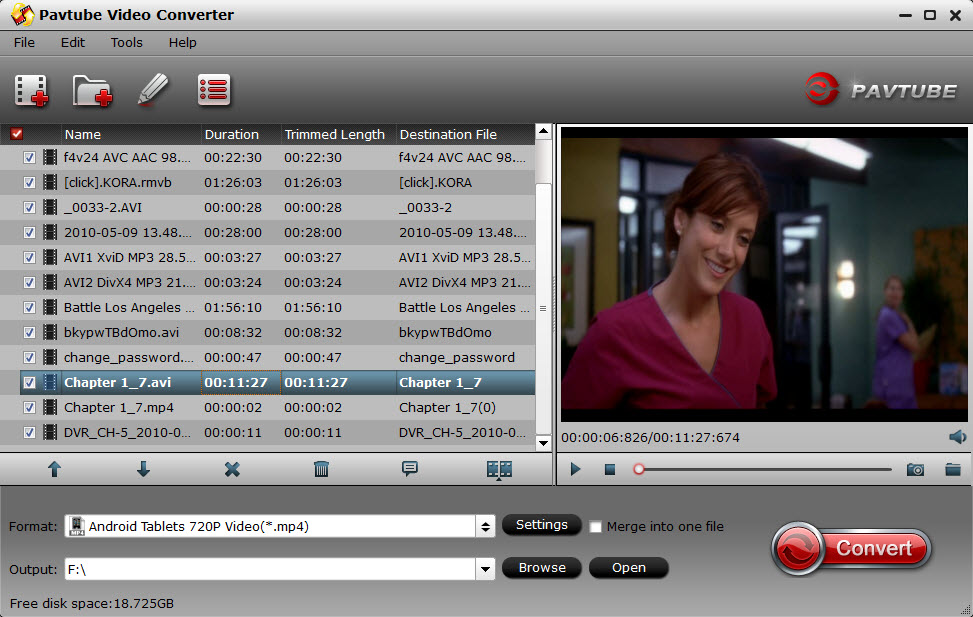
You can directly drag and drop the MKV files into the program or click “File” > “Add Video/Audio” or “Add from Folder” to load the source MKV files into the program.

Step 2: Output Camtasia Studio supported file formats.
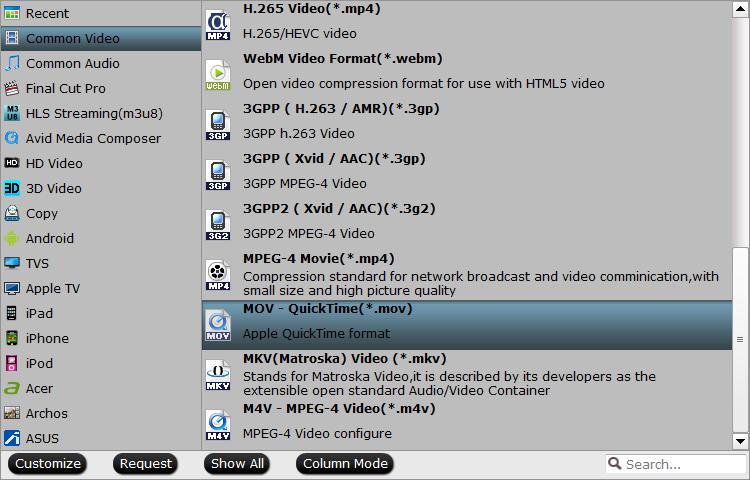
Click “Format” bar, from its drop-down options, select one of Camtasia Studio imported file formats such as QuickTime MOV files under “Common Video” main category.

Tips: As Camtasia Studio supports QuickTime mov files no more than 30 frames per second, you can adjust the output frame rate in the program’s “Profile Settings” window to let it fit with Camtasia Studio.
Step 3: Edit MKV files with built-in editing tools.(Optional)
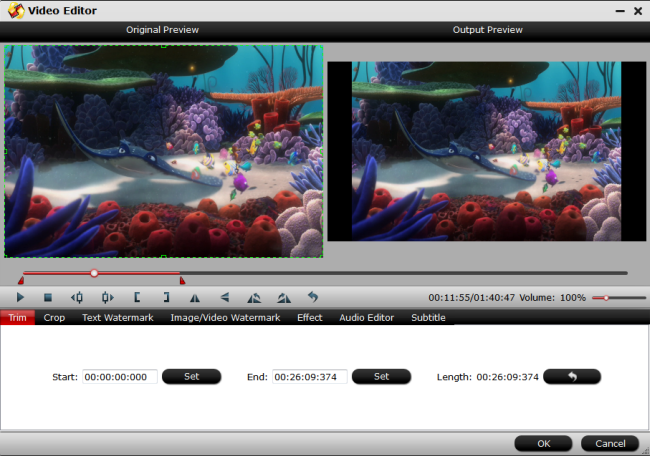
On the top tool bar on the main interface, click the pencial like icon to open “Video Editor” window, you can trim MKV movies to remove the unwanted parts by setting the start and end time, crop to remove the black borders or unwanted area by dragging the dash line around the video frame, flip video, add text/image/video watermark, change video picture effect, replace/remove audio in video, add external subtitles, etc.

Step 4: Carry out the video conversion process.
Go back to the main interface to begin the conversion from MKV to Camtasia Studio supported file formats.
When the conversion is completed, feel free to load the converted video into Camtasia Studio for creating amazing video.


